Showing posts with label preschool art project. Show all posts

Friday, April 6, 2012

Life Cycle Butterfly Part 2

So step two in the life cycle of a butterfly is the hatching of the egg into a caterpillar.

Materials needed:

1 each of green and white construction paper
pen
markers in black and yellow
scissors
hole punch
glue


Draw a simple caterpillar shape onto the white paper, making sure that it is smaller than the leaf otherwise it will hang off the edges.


Cut out your caterpillar. Draw irregular width lines across the body.


Taking your yellow and black markers, alternate coloring each stripe in black and yellow but leaving some white. You can glue a googly eye onto the caterpillar for a little more fun.


Glue the caterpillar onto the leaf.


When the eggs hatch, they eat the leaf. Take your hole punch and make a bunch of holes to simulate the leaf being eaten!

Life Cycle Butterfly Part 1

There will be 4 parts to this project. This first part is the start of the cycle with the eggs being laid on the leaves.

Materials Needed:

1 piece 11" x 17" green construction paper
glue
pen
green marker
scissors
tissue paper in white, yellow or light green


Fold the paper in half and then freehand draw a large leaf onto the paper. You will need a leaf for this part and for part two so I will cut both at the same time and save time and energy.


Cut out two leaves and place one off to the side. I folded the leaf in half lengthwise to make it a little more realistic.


Take your green marker and draw the leaf veins all over the leaf.


The final step is to take small squares of tissue paper and crumble them up into little balls. I used cheap, thin paper but harder to glue. Tissue paper is much easier to use and glue. Take the little balls "eggs" and glue them onto the leaf.

Saturday, March 10, 2012

Iguana

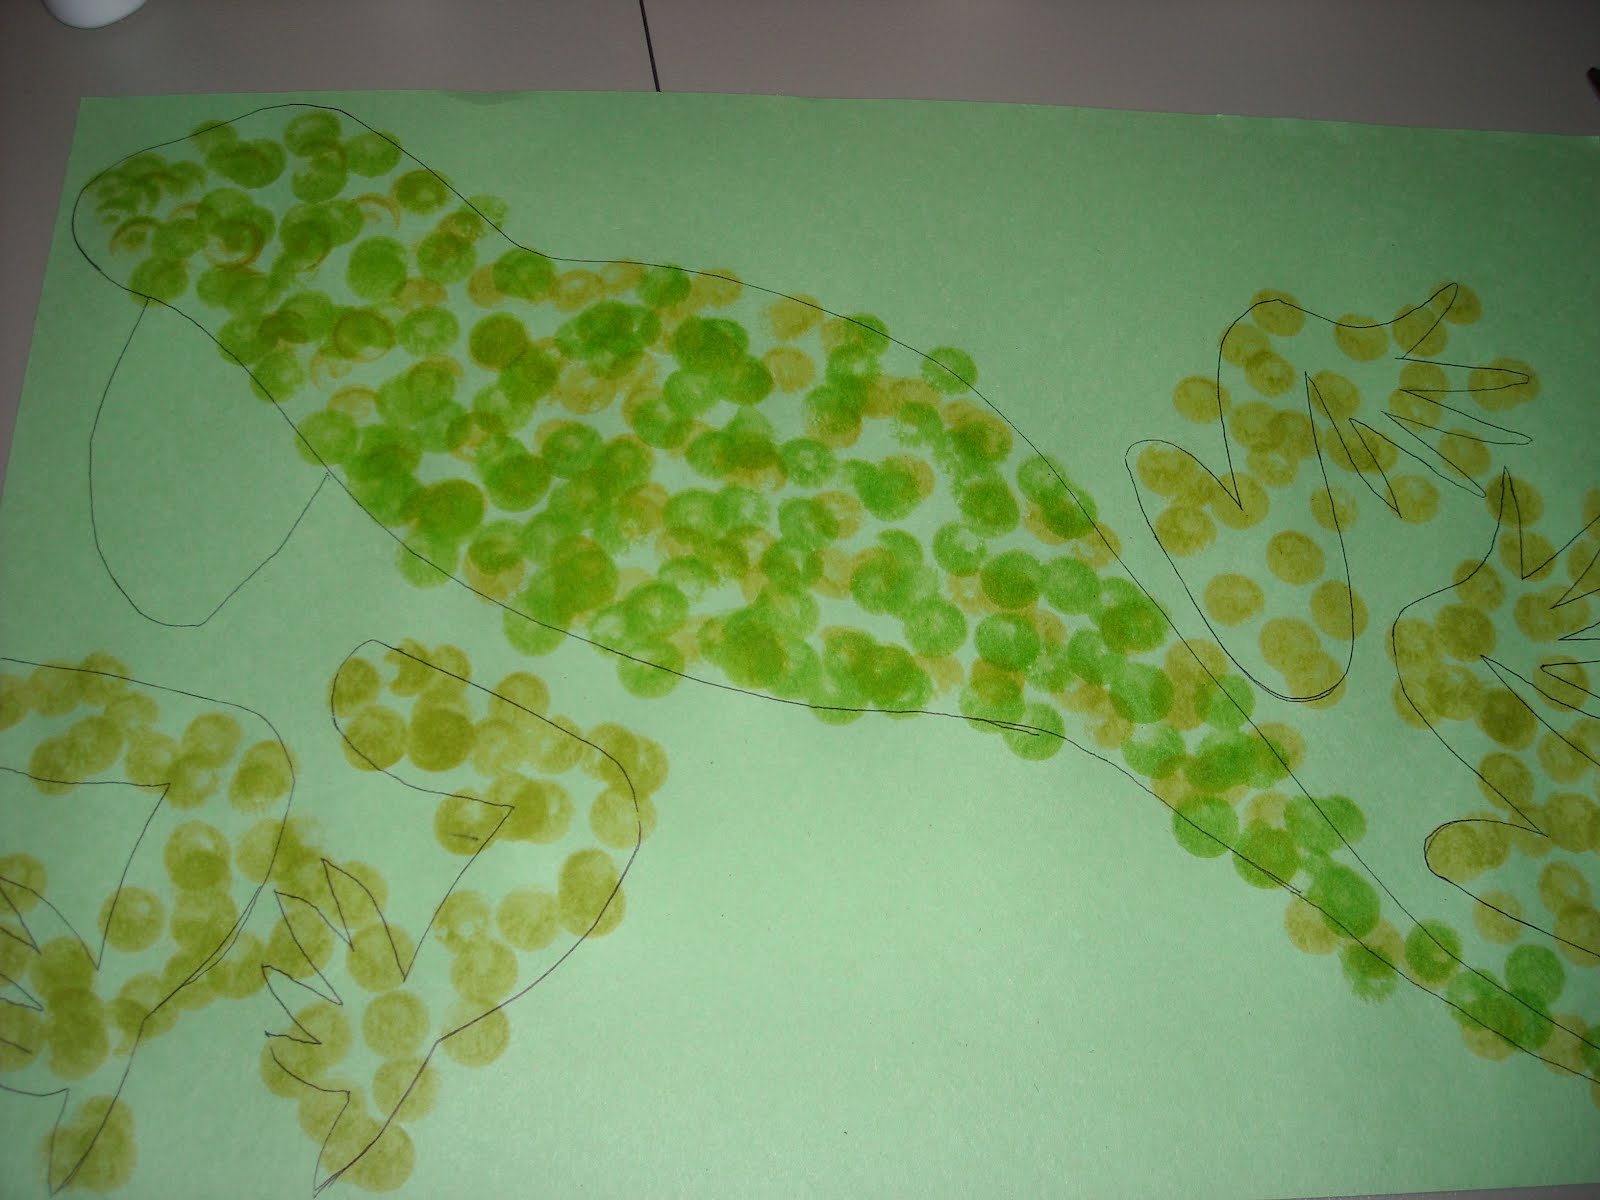
As part of the reptile grouping, we will be making an iguana. This one is more complicated and can be used by many ages. The kids in our class will cut out the body (hope they get to keep the tail!) and we will cut the legs. Older kids with better cutting skills can cut their own feet.

Items needed:
Ink stampers in green, yellow, violet, brown
brown and green construction paper
tissue paper in green or brown
pen or pencil for tracing
scissors
glue
1 medium googly eye

Getting started:


I have drawn a pretty easy body shape on a large sheet of construction paper and keeping fingers crossed the tails aren't completely cut off!


The first step is to stamp the body. It is easier to stamp before the cutting. Here I have stamped green first and then the yellow.


Next step is to stamp the brown and the violet. The colors go on dark but turn much lighter when dry. The inks dry pretty quickly.


Once dry, the kids will cut out the body. Adults will cut out the legs. I am planning on having the kids stamp this in the morning and get the legs cut before art time. In art class, they will assemble the iguana.


The legs are assembled with two on the backside and two on the front. I love their interpretations! The spiky back was created with the diecut machine at the main office. It is the grass border stamp. But you can create your own using pinking shears or any scissors that have the jagged edge. If those are not available, then just create an exaggerated jagged edge and use that instead.


Take a small square of tissue paper, I used green but brown would also work. Fold it to create lines. That's the goal but kids have their own ideas and that is fine too!


Glue the tissue to the piece under the neck.


Add the googly eye and hang up when dry! I am thinking of creating a large tree branch for these little guys to walk on! Can't wait to see what they create!

Red Eyed Tree Frog

Reptile and amphibian weeks are in full force in the classroom! This little guy is just too darned cute not to include!

Items needed:
Large paper plate cut in half
Green Paint
Glue
Construction paper - red, black, yellow, green and orange
Scissors
pen or pencil

Getting started:


First step is to paint the paper plate. I used glossy green paint because I had it left over for a project. You can use green paint and add some glue to it to help make it shinier. Put it off to the side to dry.


Here is the cut outs for the frog. A solid green body is used and then yellow is cut to create the underbelly of the frog and create its mouth. The little hands really make the cuteness factor go up on this one!


Glue the yellow onto the green background. Then add the black eye centers to the red and glue onto the top of the frogs head.


Glue the frog to the back of the plate and glue the "hands" on top of the plate.


You can leave the plate as is I suppose but I had to take it one step further and cut notches out to create a leaf like appearance. I really love his "hands"!

Snakes and Shamrocks


Well we finished our snakes and the kids did an awesome job! We have a clothesline that runs across the room so we wrapped them around it and had them hanging up for all to see! This is a great project if you are doing anything in the reptile kingdom. Make a bunch of different types of snakes or additional reptiles and you have a habitat growing in your class room!


We have finished our shamrocks and added them to the bulletin board. Once the leprechauns are finished next week, we will place them around the board and add the pot 'o gold to complete the scene!

Tuesday, March 6, 2012

Reptiles and Amphibians - Turtle

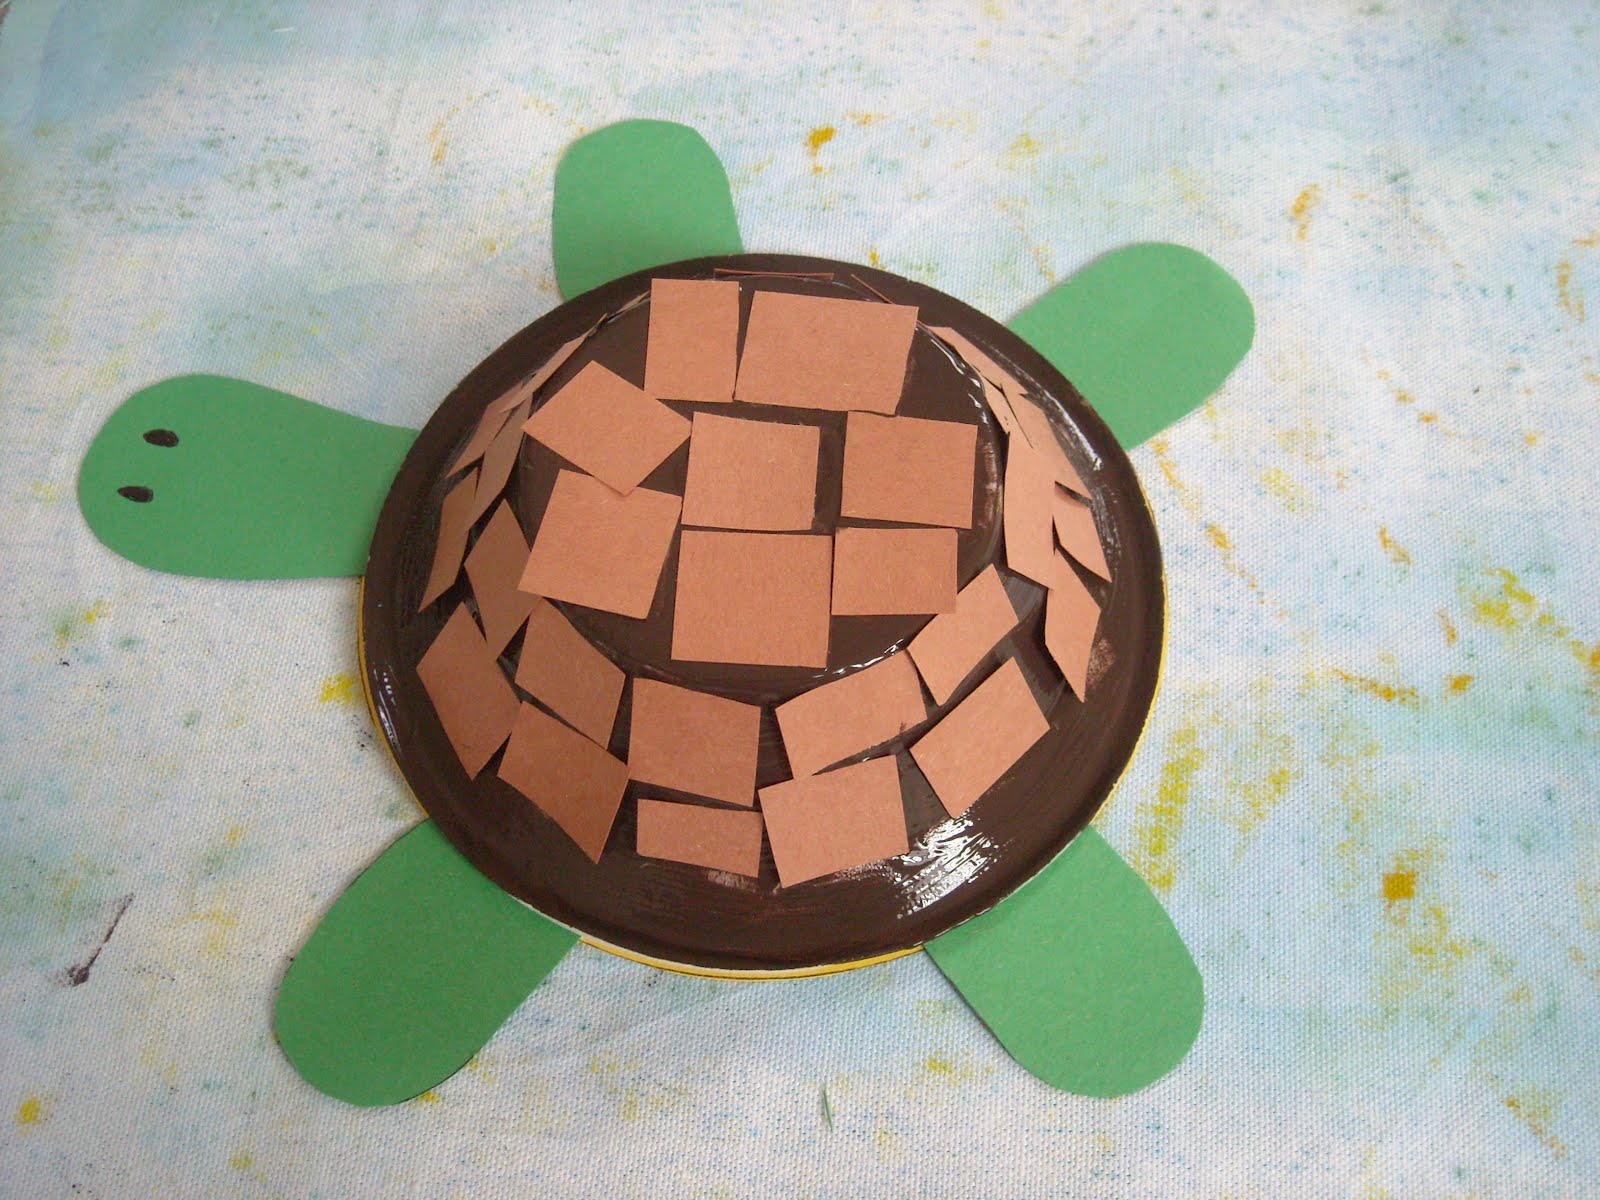
Another creature from the reptile world (and my sons favorite) is the turtle! I was at the dollar store and found these styrofoam bowls and it clicked that we could use them to make the shell of a turtle.

Items needed:
1 small styrofoam bowl
yellow, and green construction paper
brown construction paper cut into small squares
brown paint
white glue
scissors
paintbrush

Getting started:

It is easier to assemble the bottom of the turtle first and then the shell. So I started out by tracing the body in yellow using the bowl.


After cutting it out, I attached the head and feet. (I managed to forget something very important. Can you guess? Put the body off to the side to dry.


The next step was to add glue to the brown paint and mix together. I wanted to be able to paint and glue in one step. After paint is mixed, cover the entire bowl with the brown paint. Add the brown paper squares around the sides and then the top.


The final step is the glue the shell to the body. I ran a ring of glue around the outside of the yellow body and placed the shell on top. It may help to let the paint dry first so there is no smearing.


Draw a couple eyeballs on or used googly eyes! It was at this point I realized I was missing something. Did you guess? His tail!

Reptiles and Amphibians - Snake

I was sick of doing the paper plate snake and found a huge stash of paper towel rolls in the closet. Looking at the curving line going around, gave me an idea for our project.

Items needed:

1 paper towel tube
green paint
yellow paint
red construction paper
2 googly eyes - medium sized
scissors
glue
paintbrush

Getting started:


I added some green paint and some yellow paint into a container without mixing. The kids love to combine paint colors. (I do too!) After the tube is done painting, I set it up on end to dry. If you have small bottles of paint, you can put the tube over it to help it stand up straight until dry.


After letting the tubes dry overnight, the kids cut out the tongue and then glue it on the snake. They also add the eyes with glue.


The final step is to cut the paper roll in a spiral. This will be difficult for preschoolers, but older and more experienced scissor cutters can do it themselves. I did this one kind of fat. You can cut it as wide or narrow as you want, but stop about two inches from the top so you still have a head!

Monday, February 27, 2012

St. Patty's Day Leprechaun

St. Patrick's Day needs a little leprechaun. I designed this for our preschoolers to create in the next few weeks. These projects also help to transition our classroom from hibernation into spring!

Items needed:
small paper plate
flesh colored paint (or make your own with white and a small amount of red and yellow)
paint brush
construction paper in green, black, orange, red and brown or pink (for ears)
medium googly eyes
glue


First we start out by painting the back of the plate. It's easier to glue everything on to the back than to the front. Put it off to the side to dry. (We will have the kids paint their plates on one day and glue another.


Cut out the different parts to the leprechaun. I started by gluing on the eyebrows and the beard.


Then glue on the ears, feet, hat and band. The eyes are glued on last. The kids will have their own version of your sample and it will not match. And that's okay. They are learning to follow instructions and expressing their creative self. That's the main goal! After we do this project, I will take pictures and show the various "interpretations!" (I had more pictures of step by step but they vanished off the camera!)

St. Patty's Day Shamrocks

I would have posted this sooner but caught the creeping crude that goes around this time of year. This is a very easy project to do with almost any age.

Items needed:
pen
white construction paper
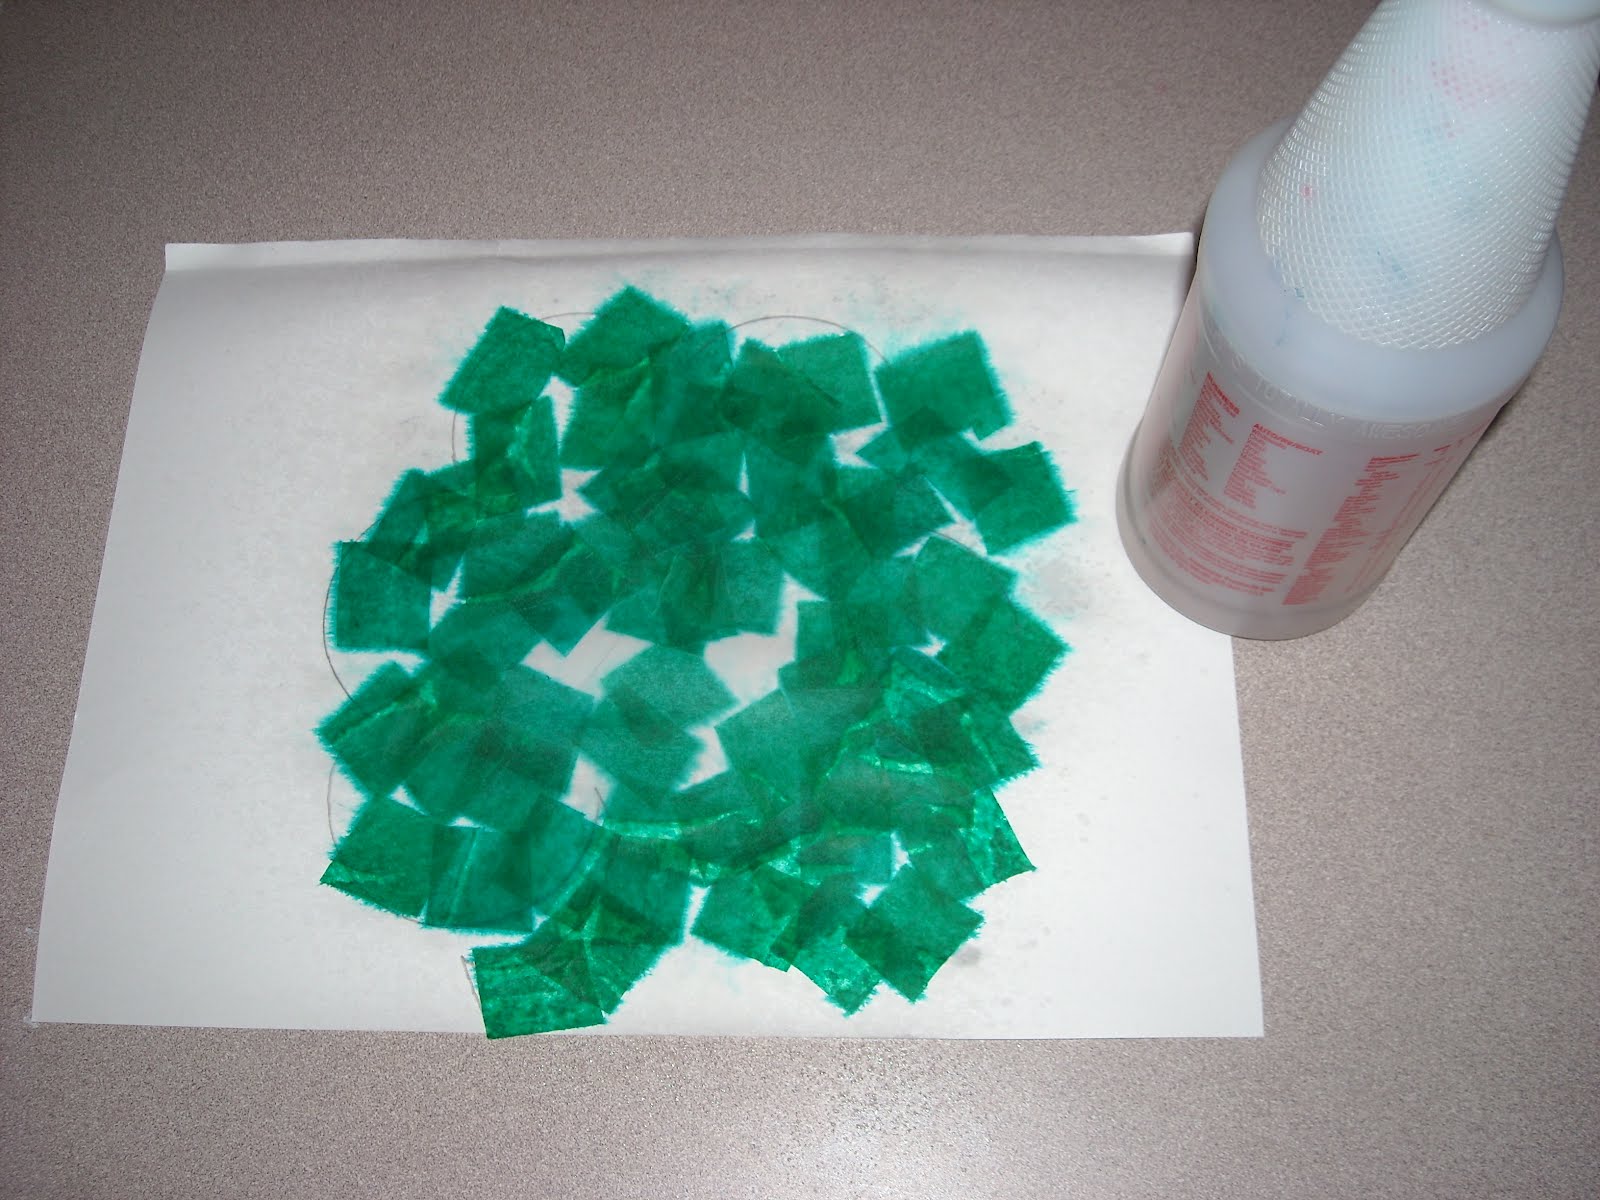
BLEEDING tissue paper in green cut into small squares
MAKE SURE IT IS BLEEDING TISSUE OR IT WON'T WORK!
squirt bottle filled with water
scissors

To begin:


Using a pen, trace the shape of a shamrock onto the white paper using a pen. I didn't have a shamrock shape, so I created my own using a glass. It took several tries to get it almost proportionate but this will work. If working with a group of kids, write their names in pen on the backside. The ink won't bleed. Using a marker will cause the name to bleed and make it hard to read as well as bleed to the front of the design.


Bleeding tissue paper is found at most art supply stores. Michaels carries it-usually near the scrapbooking section. Have the kids add a layer of the tissue paper onto the shamrock. With smaller kids, they have a tendency to dump handfuls on. Not much is needed to create the look. You can also use some yellow and that will give you several different shades of green!


Now the fun part! I found a bottle at the hardware store. They are usually in the gardening section. But an old hairspray bottle, cleaned out can also work. Spray water over the entire piece. Kids love to spray water! This starts the bleeding process immediately!


This shows the paper completely covered in water.


After spraying, set your picture off to the side to dry completely. Depending on how much water the kids added, the drying times will differ. They can rip if too wet.


Once they are dry, the tissue paper comes right off with a brush of the hand. (Mine was still wet when I did this) You can see the beautiful coloring left behind! The kids can then cut out the shape and they are ready for hanging up!

We will be doing this project and creating a patch of clovers on the wall. I will make a four leafed one to hide in the grouping. Shh. . .

Tuesday, February 21, 2012

Shamrock Wreath

Well we will be heading into March pretty soon and that means St. Patrick's Day! So I decided to get a jump on our projects while I had some free time. Today's post is a Shamrock Wreath. The kids can make this and take it home to hang on their doors! I still need to add the string for hanging but it is still drying.

Items needed:
1 large paper plate with the center cut out
brown paint
shamrocks in two different colors (we have a die cutting machine at work so I cheated!) I used 5 for this project
yellow construction paper (if not using foil)
glue
scissors

if using foil -
gold foil glued to any color paper
silver foil and color with yellow markers after gluing to paper
you can also use metallic paint in gold


Start by having the kids paint the entire backside of the plate in brown. (It's easier to glue everything on this side) Put off to the side and let to dry. We will have the kids paint this when they first get to class so we have time for it to dry before art.


I painted a thin layer of gel medium onto the paper (my glue bottle was mad at me so I had to improvise) and then I laid the gold foil on top. (My husband works at a printing company and brought this small roll home that was unusable by them) Run the side of your hand across to smooth it out and remove any air bubbles.


As you can see, because the paper is thin, it curls up when finished gluing. Lay the sheet face down and put something heavy on top to flatten it. After about five minutes, it is okay to start cutting. Using sharp scissors helps too. I used a spool of thread to trace the circles. Tracing on the backside makes it much easier to see when cutting. We don't have a die that small so it's by hand for me.


Here are some of the shamrocks made on the diecut machine. I think it is by AccuDie but not sure. Don't look too closely at the shamrocks as I didn't have the paper completely covered on the die and chopped off small pieces. I decided to use those for my class sample and let the kids use the nice ones. I am such a good person ;) Glue each one down, alternating between the two colors and overlapping slightly.


To finish this off, I glued gold circles (coins) around the wreath. I made a small black pot for the "pot o' gold" and glued a couple coins to the back. I then glued the pot onto the bottom of the wreath. To finish this off, I will hole punch at the top and run string through for hanging. Happy early St. Patrick's Day to you!