Learning about the weather is fun. As we learned about the different types of weather, the preschoolers created a piece each day to put on their mobile. All of them hanging up together made our room bright and lively.
Items needed:
1 wire hanger per mobile
construction paper in yellow, orange, light blue and white
small piece of poster board in white
two cotton balls
glitter - gold and silver
glue
foil
blue and white paint
hole punch
puffy paint!
Our first part was the cloud. We traced an easy cloud shape on paper and had the preschoolers cut them out. Then they added glue all over the cloud and covered it with the cotton balls. You may have to show them how to pull it apart so they have enough to cover the whole cloud.
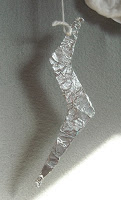
We traced and cut a simple lightening bolt shape onto the poster board. It is hard to cut so we did that part for them. We gave them each a small sheet of foil and they had to wrap it around the cardboard bolt. It was a little difficult. We found giving them strips of foil to wrap around was a little easier to manage.
The raindrop was fun. We traced the shape of the raindrop onto white construction paper. They cut out the shape and we painted it with puffy paint. The puffy paint was made with shaving cream and glue. The blue coloring was a couple drops of liquid water colors. You could also use food coloring or paint. We put a dollop of the puffy paint onto their raindrop and they had to smear it around so the whole drop was covered.
To create the snowflake, we gave them each a small square of blue construction paper - or the equivalent of a quarter of an 8.5" x 11" piece of paper. They were given a tray of paint containing blue and white tempera paint and a small paint brush. They were told to paint the entire side with a mixture of the two colors. When they were done, we sprinkled some silver glitter on it and put it off to the side to dry.
The final piece was the sun. Now we traced a little sun shape on yellow construction paper and realized they would probably struggle with cutting on this. More likely, they would cut all the tips off! So we did that part for them. They had to cut out the center circle in orange and glue it to the center of the sun. Each child was then given a bottle of glue to draw on a pattern. When they were satisfied with that part, we sprinkled gold glitter on, shaking off the excess. Bottles of glitter glue could also be used so that the glue and glitter are done in one step.
Assembly:
The snowflake needed to be finished before we could assemble. Remember those days as a child, you folded up paper and made random cuts. Then you opened them up to reveal a paper snowflake? Well you can do that to make it more snowflake like or in our example, we cut a curvy shape around the outside and then used a paper punch to create holes inside it. Either works.
After all the pieces were dry, we punched a hole at the top of each and ran a piece of yarn through it and tied with a simple knot. The yarns should be in different lengths so the pieces don't bang into each other on the hanger. Attach the yarn at the base of the hanger and tie a simple knot. Hang your mobile up and enjoy!


No comments:
Post a Comment